0

Fun with dye

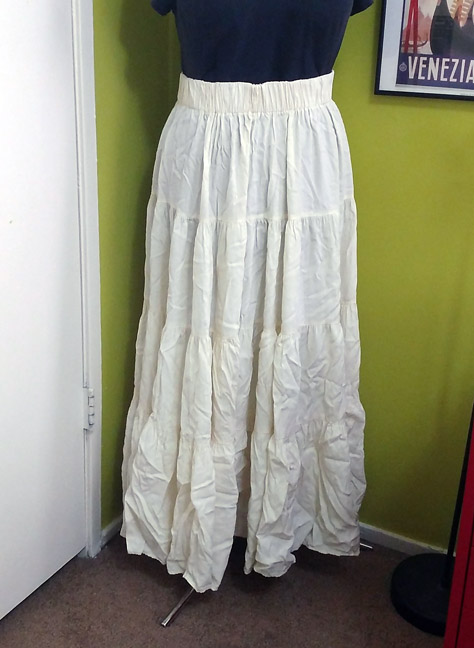
I recently got a tiered circle skirt at an estate sale for a dollar or two. It seems to be a square dance skirt and is made of sturdy cotton. I did wear it once as-is, but it was a bit long on me and I was not a fan of the natural cotton color.

skirt1

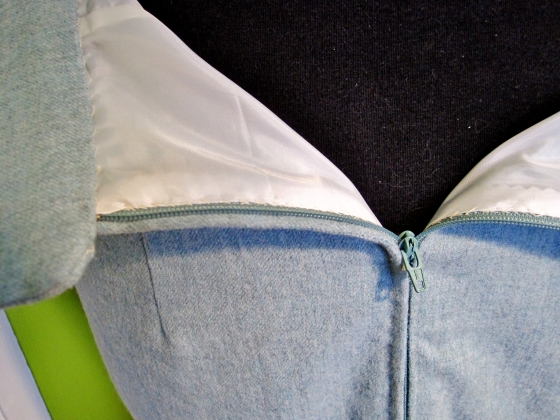
I promise it wasn’t this wrinkled when I wore it.

The light color also made it a bit more sheer than I prefer.

skirt1b

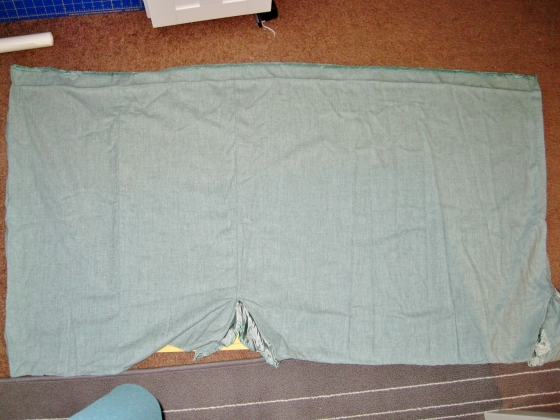
My first step in the transformation of this skirt was to remove the lowest tier. This took forever–there is a LOT of fabric in this skirt.  Removing the bottom foot or so of fabric made it a lot less overwhelming in length and weight. The next step was deciding on a color to dye it. I thought about a nice bright cobalt or deep red, but since the skirt style is a little out of my comfort zone anyway, I decided to go with black so it would blend in with the rest of my wardrobe. Finally, I sewed up the hem using another estate sale find, this beautiful vintage Necchi sewing machine.

necchi

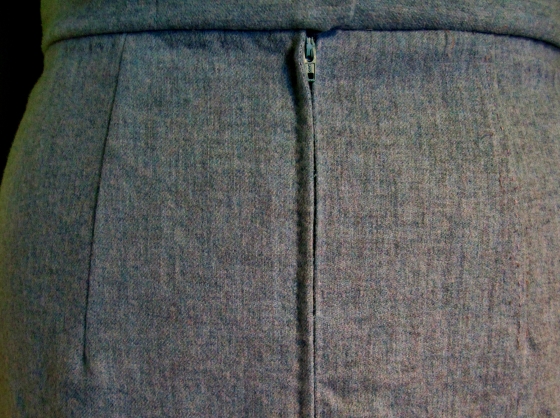
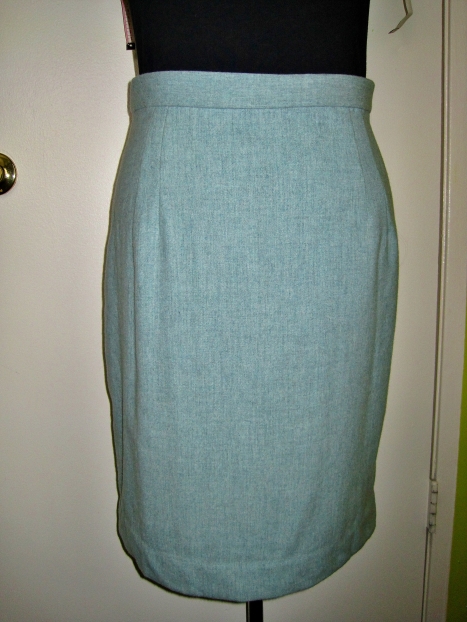
I bought regular old Rit dye from the supermarket–I chose the liquid version and followed the instructions for adding salt and dish soap. Unfortunately I didn’t do it perfectly, because it came out as a dark purplish-blue.

skirt2

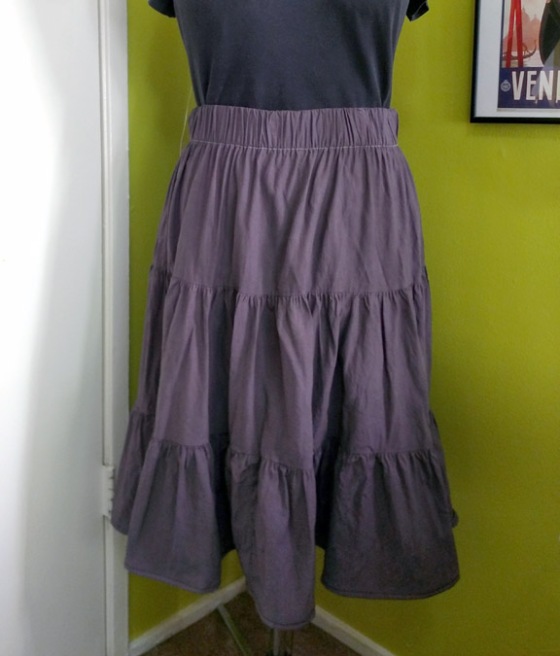
I do kind of like this color, though, so I’m debating whether to redye it to get the deep black I wanted or to leave it like this.

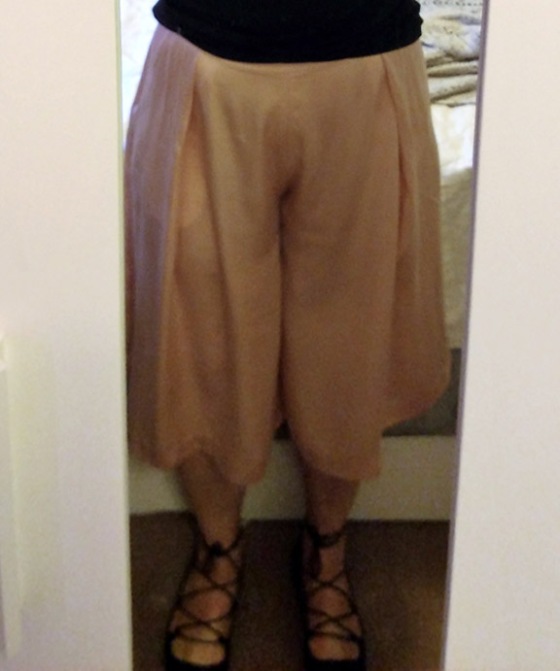
I also took the opportunity to dye another estate sale find. I purchased some pale peach silk culottes for a couple of dollars, thinking that if I didn’t wear them (again, a bit out of my comfort zone), I could use the silk for another project. I did end up wearing them twice, but was not in love with the color. Here is a bad mirror selfie to give an idea of what they originally looked like.

culottes

I was a bit nervous about dying silk so I read a bunch of tutorials. I used black Rit dye for these as well, but ended up loving the deep purplish-blue color that they turned partway through the process.

culottes2

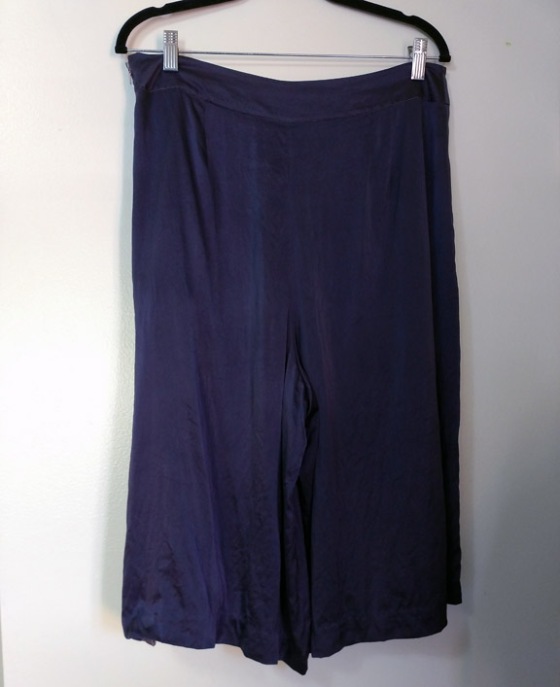
I can’t believe how beautiful they are now and I can’t wait to wear them!

I also dyed a white shirt that I bought on Amazon and stained with tea the first day I wore it. Who would have thought that $3 bottles of dye could be so much fun?

0

Building a chicken coop

Having grown up with chickens, I have wanted a backyard flock for years. This spring we finally decided to go for it. After perusing dozens of coops online and in stores and not finding exactly what I wanted, we finally decided to build our own. Since neither of us has much building experience, it turned out to be quite a project. It also cost considerably more than just ordering a pre-made coop, but ours seems much sturdier than the coops we saw at places like Tractor Supply, plus we had the satisfaction (and frustration) of building it ourselves.

We based our design on this plan from The Tangled Nest, but with some modifications due to both our needs and our inexperience.

We covered the floor with a cheap vinyl flooring remnant to protect the floor and make cleanup easier. We did not sink the support 4x4s into the ground, as we wanted to be able to move the coop if necessary.

The framing took a while, but we (well, J mostly) worked on it pretty much every weekend, despite weather conditions.


The plans we used were not very detailed, and there were a few issues. For one, the roof didn’t seem to fit correctly. I’m not sure if this was an error in the plan or in our measurements. It isn’t perfect, but I think it turned out okay. We modified the design by adding a vent over the door for more light and air. We covered it, the bottom of the coop, and the run with 1/2 inch hardware cloth, held in place with u-shaped poultry net staples. The staples were a huge pain to nail in place properly, but they are really secure. With raccoons in the neighborhood, we wanted to be sure to make the coop as predator-proof as possible.

When construction of the coop was pretty much complete, I primed the whole thing white using some primer left in our crawlspace by a previous owner.

Our city ordinances require 6 square feet per chicken. The coop is 18 square feet, perfect for three chickens, plus we made a run measuring a total of 36 square feet, half under the coop and half at the side.  A 12″-square opening leads from the coop into the run and the chickens have access to the run at all times. Since the whole thing is enclosed with sturdy hardware cloth, we don’t need to worry about leaving them for a weekend.

We originally intended to make a plywood door for the coop, but as we were building it we were replacing the windows in our house and noticed that one of the old window panes was almost a perfect fit for the opening. With a little sawing and planing, we had our door. I stapled hardware cloth to the back for extra security. Unfortunately before we hung the door, it blew over in the wind, breaking the glass. We covered the door with clear acrylic instead (probably safer, anyway) and screwed it in place. From the leftover acrylic I cut another piece to cover the vent above the door in case of really inclement weather. I screwed three large washers in place to hold the acrylic in place if necessary.

We secured the coop and run doors with latches closed with carabiners–one for the coop door and two for the larger run door. The carabiners are a bit tricky to remove, but I figure if we have trouble, raccoons will, too.

Before bringing home our chickens, I sealed the cracks and gaps on the floor and lower portions of the coop with caulk. I also installed two roosts and hung a feeder (their water is outside to prevent too much moisture in the coop). Finally, I added some solar LED lights to illuminate the interior of the coop, which is supposed to make them feel safer and encourage them to sleep inside (spoiler: it isn’t working). I originally intended to paint the interior, as it is supposed to discourage mites, but my excitement for chickens was too much and I didn’t want to wait any longer to get them. Perhaps I’ll paint it in the future.

Overall, the project probably took us 5 or 6 weekends, but some of those weekends were rainy or snowy so we weren’t able to do much. Honestly, J did most of the work–he took care of most of the actual construction and I did the planning and finishing. It is still not quite complete–there is some painting and finishing to be done–but we are pretty happy with it and we learned a lot in the process.


0

Medusa headdress

My Halloween costume this year was inspired by a Medusa headband I found at a yard sale. It is pretty basic, but I thought it had potential.

I found some rubber snakes on Amazon–a dozen 11-inch rubber ones and another dozen smaller, but more realistic ones–for a total of about $14.00. I wanted to have a variety of sizes and shapes to work with.

I bought some gold spray paint and added a coat to each side of the snakes and to the headband. The headband was already gold, but I wanted everything to match. When the paint dried, I threaded the rubber snakes through the plastic headdress until I was satisfied with the look. I saw some Medusa headdress tutorials that suggested hot gluing the snakes together, but I wanted to be able to change them or use them for another project someday. I did tie a few in place using embroidery thread so they could move around a little. After I had the shape I wanted, I added another couple coats of spray paint.

I originally intended to paint the snake eyes black and the tongues and mouths red, but I couldn’t find my acrylic paints. I experimented with Sharpie and nail polish but found the whole process too tedious and abandoned that idea.

For the costume, I wore a white Greek tunic that I made years ago and added a long black skirt underneath. For Medusa’s wings, I bought a gold metallic wing cape on Amazon. I also bought a set of face paint–I saw a lot of Medusa makeup tutorials online and originally envisioned a green face. However, since my costume was pretty much gold, black, and white, I wanted to stick to a more neutral palette. I mixed some tinted moisturizer with metallic loose pigment and some white face paint. On top of this, I added some black details with a little hint of green. I put a fishnet wig cap over my face and used a brush to apply more metallic powder for a snakeskin effect. It didn’t show up super well, so I used black and gold eyeliner pencils to increase the effect. I brushed metallic gold powder liberally over my face, lined my lips in black eyeliner and filled them in with face paint, added some details to my nose and eyes, and that was about it. There was some green metallic body glitter in the face paint kit (’90s flashback!), so I used some of that, too.

I put my hair into a wig cap leftover from a previous year’s costume, put on the headdress and arranged it so the snakes looked good, dusted some more gold on my hairline, and that was it.

The costume looked great from the front but less so from the back and sides–if I wear this again, I will definitely get some more snakes to fill out the back and distribute the weight more evenly. I had a pretty killer headache by the end of the night.

Oh, and there was one little coral snake I couldn’t bring myself to spray paint, so I threaded it through my treat basket.


Project costs:

Headdress (yard sale): $2
Snakes: $14.12
Spray paint: $4.99
Face paint kit: $16.42
Additional makeup: $0 (already had)
Wings: $15.50
Dowel for wings: $1.49
Tunic: $0 (left over from another costume)
Black maxi skirt: $0 (from my closet)
Total: $54.53 

Not too bad considering I will get a lot of use out of the face paint and the wings. I’m already envisioning the wings in an Egyptian goddess costume.

0

Felt dolls

Somehow I came across a tutorial for some cute felt paper dolls online and decided they were too cute not to make for my youngest niece. I looked up a few versions of these dolls to get an idea of how to make them. I wanted to make a little house for them, too, but I didn’t quite get that far. Maybe next year!

Project:
felt paper dolls

Materials and cost:
felt ($5.50 for a pack of mixed colors at JoAnne)
fabric scraps (free–from my stash)
embroidery floss (already had plenty)
total cost: $5.50 with tons of felt left over for other projects

Time:
several hours (one evening and an afternoon)

Process:
I sketched out a body-shaped pattern on plain white paper and when I was happy with it, cut it out and traced it onto some cardstock (from junk mail). I wanted to make them a big enough size for a toddler to play with, but small enough to be portable. They ended up about 6 1/2 inches high.

doll_pattern

I decided to make three dolls. I traced the pattern onto the lightest one, then stacked up three pieces of felt and cut them all out together. I added white felt underwear for modesty.

dolls_cut_out

Next I added simple faces with embroidery thread and created hairstyles using felt. Each hairstyle is made of two pieces–one on the front of the head and one in back. I tried to make them cute but simple. This step was fun because it gave the dolls some personality.

dolls_hair

Next I pinned each doll to a piece of white felt for a backing. After sewing the hair and backing in place, I cut out the white felt to follow the shape of the doll. I think this was much easier than cutting the white backing first and then trying to sew it on properly.

dolls-sewing

That was it for the dolls. I think they looked pretty cute, though I had some difficulty sewing the hair–the pieces were so small!

dolls2

Next were the dresses. Each one needed a felt backing, both for stability and to make it stick to the doll. For these, I traced my cardstock pattern onto white paper and drew a basic dress shape over it. I cut out the dress and traced it several times onto white felt. I improvised some variations in neckline and sleeve length, and also made some skirts and tops out of the same pattern. I placed each piece of felt onto a scrap of fabric and cut around it. I wish I had cut out the dress shapes first, sewed the fabric and felt together, and then cut out the felt like I did with the dolls themselves–it would have been much easier. Live and learn.

dolls_sewing_dress

For this step, I found it easier to use Wonder Clips than pins. I also tried to choose fabrics that didn’t fray too much and sewed as close to the edge as possible.

I ended up making seven dresses, two skirts, two shirts, and a little ballerina outfit. I originally intended to make shoes and other accessories, but the clothes just about drove me insane. Again, I am not good at fiddly things.

dolls_done

For some reason, I did not manage to get a single good photo of the finished product. 😦

I put all the parts in a little organza bag and the recipient seemed pleased with them. I would definitely make these again, but next time I’ll try not to wait until the last minute.

0

Garden progress

After a rocky start, the garden is actually looking pretty good. Our first cherry tomatoes were ready to harvest around the third week of July and they are delicious. I’ve harvested around 60 of them so far, with many more to come.

sm tom

So far the PVC trellis is working really well. It supports six potted tomato plants, some in large plastic pots and others in fabric Smart Pots. As they grow, I tie the plants to the trellis with old tights, which are gentler on the stems than twine. I wear tights a lot and this is a great way to recycle them when they become torn or stretched out.

sm tom plants

supersweet cherry tomatoes

sm hrlm

Abe Lincoln heirlooms

I think the plants are a little too close together, but so far there haven’t been any problems. One of the plants is just slightly taller than the trellis right now, but putting them in pots controls their size somewhat.

The bell peppers are also doing nicely so far, and if all goes well we will have a really good harvest.

sm bell ppr

The eggplants have blossoms, but no fruit yet.

sm eggplant

I also got my first batch of finished compost from our tumbler. I had to sift it to remove some pine needles and whatnot, but it looked really good. I applied it to the existing plants and worked it into the soil for the fall crop of radishes and greens. I’m hoping for more success with this new round of vegetables.

0

Arugula, Gorgonzola, and caper pasta

After our very wet spring, the weather is starting to dry and heat up. The arugula in the garden started bolting, so I needed to figure out what to do with it right away. I decided on a simple pasta recipe that combined some things I already had on hand.

I used all my bolting arugula–five small plants. They didn’t provide a huge amount of leaves, but it was enough.

IMG_9604

For the sauce, I very loosely followed this recipe that I found via a Google search.

I used veggie penne because that’s what I had available (I like to sneak in extra vegetables when I can). For the sauce, I used a bit of milk (measuring is not really my thing) and 2 or 3 ounces of Gorgonzola, stirred until the cheese was pretty much melted, then added some capers, the pasta, and the arugula and stirred until the pasta was coated and the arugula was melted. Super easy. I think this might have been even better with mushrooms, though, so I’ll try that next time.
IMG_9609

After a slow start to the garden, I am thrilled to have finally had my first meal this year with produce I grew myself!

0

How does your garden grow? Rather poorly, to be honest.

We have had a very wet and cool spring (including a mid-May snowfall), which means the garden is not doing very well. We have managed to harvest some radishes, but some were cracked and split from the moisture. So far, that’s it. They did taste good, so that’s a plus. I am planning to make pesto from the greens.

IMG_9553

I’ve planted the tomatoes and peppers in large containers and they are doing fairly well, as are the peas. The beets and onions are not really growing at all. Some of our lettuces looked promising until they were damaged by a recent hailstorm. So it has been a disappointing start for our garden. Aside from the weather, I think we should have worked on improving the soil a bit more for better drainage. We’ll see how things go as the weather dries out a bit.

0

Seedlings

While we have grown vegetables in the past, starting them from seed is a new experience for us. I have been trying to do everything right, with the knowledge that if our seeds fail, it’s not too late to buy some plants. In mid-March, we planted tomatoes, eggplant, and peppers in peat pots. The tomatoes have recently grown big enough to thin and transplant, and the others are well on their way. I planted three varieties of tomatoes (two cherry and one heirloom) and chose two of each to transplant into plastic containers. They will stay here until they are big enough to transplant again into large pots.

IMG_9294

The miniature tomato leaves are so cute.

IMG_9298

At the end of March I planted some herbs, including basil, mint, and catnip. I love how tiny the mint seedlings are–they’re practically microscopic!

IMG_9290

Last weekend I planted another tray of peat pots with lettuces, beets, and spinach. It is amazing how these tiny little seeds (if all goes well) will provide us with delicious vegetables. Isn’t nature wonderful?

0

Raised garden beds and PVC trellis

Now that the weather is (more or less) consistently warm, we are making progress on our garden. When we moved in, there was really no garden space at all, so we have a lot of work to do. We decided on raised beds since we thought they would keep both weeds and pests down and be easier overall. A few weeks ago we constructed two 3′ x 6′ cedar garden beds, anchored at the corners by 4 x 4s that we sunk into the ground for stability. Then we filled them up with topsoil.

IMG_9243sm

We made a list of which vegetables to plant. Tomatoes were at the top of my list. We decided to plant tomatoes in containers so as not to take up too much space in the boxes. I’d also had great success planting tomatoes in containers in the past. But tomatoes need support, and the tomato cages I purchased last time weren’t cutting it. After doing some research on how to make an easy, durable, and inexpensive tomato support, I decided on PVC pipe. We went with 3/4-inch pipe in 5-foot lengths. We wanted to go a bit taller, but ultimately decided to choose the length that would fit in the car, thinking that we can add on if necessary. After some experimentation, we ended up making a 5′ x 5′ by 1.25′ support that would fit in the space between a garden box and our shed while leaving enough space to walk.

IMG_9278

Before we assembled the trellis, J drilled holes at regular intervals so we could attach twine. We set it up so that one side can support peas and beans grown directly in the garden box and the opposite side could support the tomatoes in containers. We used a rubber mallet to drive the ends of the pipe into the ground and I attached the front side of the trellis to the box using copper pipe straps. The straps are slightly too small, but that’s okay because they hold the PVC really tightly.

IMG_9281

I used a tapestry needle to thread polyester twine through the holes in the PVC pipe. I attached the vertical rows to the garden box using screws and washers, and J knotted the ends because I am terrible at knots. We didn’t fully string the tomato side because the tomatoes won’t be there permanently until mid-May, after the last frost. Once we put them in place, I will string the trellis around them.

IMG_9282

We didn’t glue the PVC together because we want to make sure the design works. I really like the flexibility of the PVC design–it won’t be too difficult to add to it later if we want. Also, it will be simple to add more twine if necessary. It definitely seems sturdier than those wire tomato cages, but we’ll see. And, best of all, it cost less than $30.

IMG_9283


0

Pendleton pencil skirt

Last year I bought a pale aqua Pendleton wool skirt suit from Goodwill for something like $8. I am unsure of the suit’s vintage, but the color and style of the skirt suggested that maybe it dates from the late ’70s to early ’80s. While the jacket actually fits pretty well, the skirt was long and rather frumpy, and the waist was impossibly tiny. I was sure I photographed the skirt, but I can’t find the photos, unfortunately. It was gathered slightly at the waist and had a large pleat in front. It was ingeniously constructed with pockets and only a button at the waistband for closure. Despite the tiny waist, there was a lot of fabric to work with, making it a perfect candidate for conversion into a pencil skirt. I cut off the waistband and unpicked one side seam and the back darts, leaving me with a big rectangle of wool.

IMG_8952

I used the pencil skirt pattern from Gertie’s New Book for Better Sewing, since I had been successful with it in the past. As before, I shortened the skirt by a few inches. I also decided to make a plain waistband rather than the curved one in the pattern, so I didn’t need to use boning. With careful positioning, I was able to preserve the skirt’s original hem. I used just about every inch of the fabric.

I spent more time on this than on anything I’ve ever made. I added a lining (I had to buy new fabric for this, as the original lining wasn’t big enough to reuse) and hand-picked the zipper. There was a lot of hand sewing with this project–usually I hate hand sewing, but the results were worth it. And the wool was a dream to work with.

hand-picked zipper (with some stray threads that need to be removed)

hand-picked zipper (with some stray threads that need to be removed)

IMG_8963

IMG_8965

IMG_8960

While there are a few issues, mostly with the waistband, I am delighted with this skirt! I love the way the lining makes it look so much more finished and professional. I will definitely be lining my skirts in the future.